 |
|
THIS PAGE IS ONLY FOR LEGACY PROJECTS THAT WERE CREATED BEFORE THE DIALOGUE SYSTEM'S STANDARD DIALOGUE UI SYSTEM. THE CURRENT WAY TO USE TEXTMESH PRO IS TO ENABLE INTEGRATION AS DESCRIBED IN Dialogue UIs
This page describes how to set up the Dialogue System with TextMesh Pro without using the Standard UI system. (TextMesh Pro is required.) For new projects, the recommended way to use TextMesh Pro is with the Standard UI system as described in Dialogue UIs.
REMINDER: DO NOT USE THIS PAGE. FOLLOW THE INSTRUCTIONS IN: Dialogue UIs
The TextMesh Pro Third Party Support package is provided for compatibility with existing projects that use TextMesh Pro. For new projects, the recommended way to use TextMesh Pro is with the Standard UI system as described in Dialogue UIs.
To add support for TextMesh Pro (for projects that won't be using the Standard UI system), import the package Third Party Support ► TextMesh Pro Support. This will unpack files into the folder Assets ► Pixel Crushers ► Dialogue System ► Third Party Support ► TextMesh Pro Support.
IMPORTANT NOTE: Depending on the version of Unity and TextMesh Pro you're using, you may need to add TMP_PRESENT to your project's scripting define symbols to enable support. To do this, select Edit → Project Settings → Player. In the Other Settings section, add TMP_PRESENT to the Scripting Define Symbols field. If this field already contains text, put a semicolon between the existing text and TMP_PRESENT.
An example scene is in the Example folder.
The example scene was built with the Unity version of TextMesh Pro on the Asset Store, not Digital Native's paid version nor the version provided in Unity 2018+ through the Unity Package Manager. The example scene will not play out of the box with Digital Native's paid version because the script references are different, but all scripts will still work correctly in your own scenes. To play the example scene and use the provided UI prefabs in Unity 2018+, you must update it using TextMesh Pro's updater tool: Window → TextMeshPro → Project Files GUID Remapping Tool.
The example scene uses TextMesh Pro for the following UI elements:
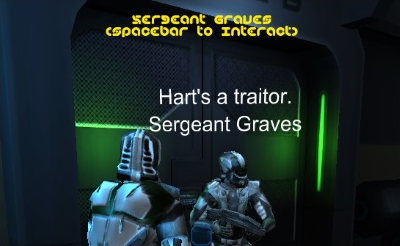
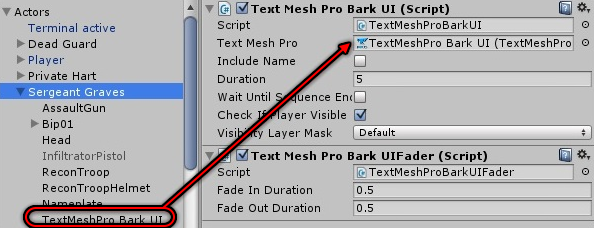
The TextMesh Pro Bark UI component uses a TextMesh Pro to display text above the NPC's head. Follow these instructions to set up barks:
The final configuration should be similar to the screenshot below:
Setup is exactly like Unity UI with these exceptions:
If you already have a Unity UI Dialogue UI set up and you want to switch to Text Mesh Pro Dialogue UI, you can use the technique below to retain the dialogue UI's field assignments, such as Dialogue > Panel, Dialogue > NPC Subtitle > Panel, Dialogue > NPC Subtitle > Portrait Image, etc. This way you'll only need to replace and assign the text elements.
The Dialogue System includes an improved Typewriter Effect for TextMesh Pro.
To localize a TextMesh Pro element (such as a "Continue" button), add a Localize Text Mesh Pro component to it.
The Localize Text Mesh Pro component localizes the element's Text field. You can assign a text table to this component or the Dialogue Manager. The Text Mesh Pro component's starting text value serves as the field name to look up in the table.
Note: You do not need to do this for text in your dialogue database such as conversations and quests. Dialogue databases contain their own localization.
You can use the Dialogue Editor's Language Text Export feature (see Exporting Language Text) to export your content to separate text files for each language. You can then run these files through TextMesh Pro to ensure that your language-specific fonts include all necessary characters.
For more about localization, see Localization.