(Click Here for Unity GUI Video Tutorial)
The Legacy Unity GUI-based UI features a fully-customizable layout. It's designed to be efficient (with a minimum of draw calls and overhead) and allow you to design your interface with a lot of flexibility. The variety of provided legacy Unity GUI Dialogue UI prefabs demonstrate what you can do with this system.
Script reference: PixelCrushers.DialogueSystem.UnityGUI.UnityDialogueUI
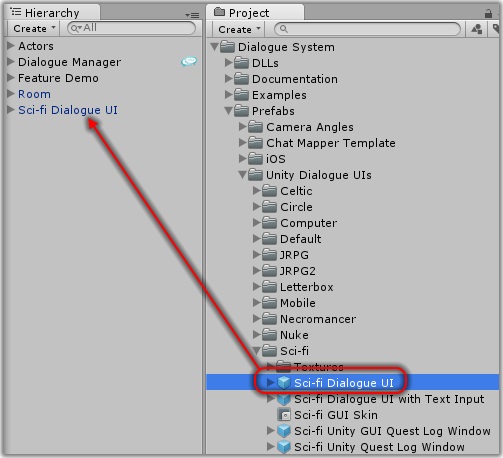
Unity GUI Prefabs
The easiest way to change the appearance of your dialogue is to assign a different prefab to the Dialogue Manager's Display Settings. The folder Prefabs/Unity Dialogue UIs contains several prefabs. You can preview them on the Unity GUI Dialogue UI Prefabs page.
Customizing Prefabs
If you want to customize a prefab, drag it into your scene and expand its children.
The GUI Root of prefabs are inactive, so you'll have to activate it in your scene object to see the GUI layout in the Game View.
If you do customize a prefab, assign the instance in the scene to the Dialogue Manager's Display Settings or save it as another prefab.
You can assign a new GUI Skin to the GUI Root's Gui Skin property and/or change the layout as described below.
Some examples of why you might want to customize a prefab are:
- Keyboard/gamepad navigation is disabled by default. You may want to enable it.
- Some prefabs don't ship with versions that include continue buttons. You might want to add continue buttons.
- Most prefabs don't have sounds assigned for button hovering and clicking or typewriter effects. You might want to assign audio clips.
- Or to simply resize or move elements, or swap out textures.
How to Create a Unity Dialogue UI
To create your own layout:
- Select Game Object > Create Other > Dialogue System > Unity GUI > Dialogue UI (top-level) to create a GameObject with a Unity Dialogue UI component.
- Select the GameObject, and then select Game Object > Create Other > Dialogue System > Unity GUI > Root to add a GUI Root.
- Assign a GUI Skin to the Gui Skin property.
- Add child GameObjects to the GUI Root object using the procedure described on the Unity GUI Control System page. Examine one of the prefabs to get an idea of the layout.
- In the Unity Dialogue UI component, assign the GUI Control properties. At a minimum, you must assign these controls:
- Alert Line
- NPC Subtitle Line
- PC Subtitle Line
- Response Menu Buttons
- Note that portrait images are GUI Labels. This allows you to define, if you choose to, a custom GUI style that uses a frame image with a transparent center. (In this case, set the label text to a blank space to bypass Unity's automatic culling of empty labels.) The Dialogue UI will draw the character portrait image first, and then the label. This will draw the label's frame image on top of the portrait image.
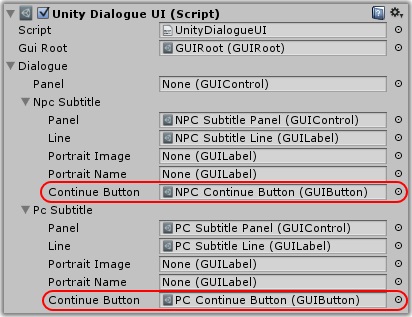
- If you're going to require the player to click a "continue" button to progress past the current subtitle, set the subtitle panel's Continue Button. In the Dialogue Manager's Display Settings, set Continue Button to something other than Never. For more information, see Continue Button. The included prefab UIs do not include continue buttons, but you can make a copy and add them manually if desired.
- If you're using the typewriter effect and you want the continue button to skip the effect forward, use the Continue Button Fast Forward component.
- If you want the player to be able to click anywhere on the screen to continue, make the continue button invisible and make it cover the whole screen.
- If you're going to require the player to choose a response before a timer runs out, also add a timer control, and set the timer value in the Dialogue Manager's Display Settings.
- Alerts can have, in addition to the alert line, an optional parent panel that can contain any other controls that you want to show, including an optional continue/close button. If you add a panel or continue button, make sure to add them to the corresponding Unity Dialogue UI properties.
More information: Unity GUI Control System
Keyboard/Gamepad Navigation
To enable keyboard and gamepad navigation:
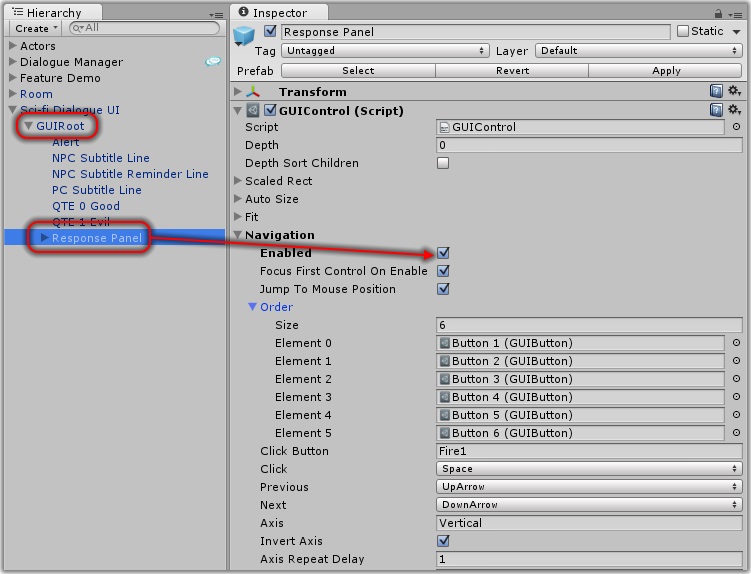
- Inspect the Response Panel in your UI object.
- If your UI is a prefab, drag it into the scene so you can edit it.
- Assign the scene instance to the Dialogue Manager's Dialogue UI field.
- In the Response Panel's Navigation section, tick Enabled. This will let you navigate with keys and gamepads.
- If your response buttons aren't already assigned to Order, assign them in the order that they should be navigated.
- By default, Unity GUI clicks the currently-focused control when Space is pressed. Set Click to change this behaviour. Set Button Click to set the name of a user-defined button (e.g., gamepad button) that will also click the currently-focused control.
- The Previous & Next keys navigate back and forth.
- The Axis settings specify which gamepad axis controls navigation, and how fast.
- Adjust Mouse Wheel Sensitivity to tune the speed that the mouse wheel navigates through responses.
- When you’re done, you can save the dialogue UI as a new prefab and assign that prefab to the Dialogue Manager’s Dialogue UI field. Or you can continue to use the scene instance. In this case, if your game switches scenes, you should make it a child of Dialogue Manager so it doesn’t get destroyed during the scene change.
Continue Button
To add continue buttons:
- On the Dialogue Manager GameObject, set Subtitle Settings > Continue Button to Always.
- Add continue button(s) to your dialogue UI. In the scene in
Examples/Feature Demo/Feature Demo with Continue Button, the dialogue UI's PC and NPC subtitle panels each have a button named "Continue Button". If you don't show PC subtitles, you don't need a PC continue button.
- Assign the button(s) to the Unity Dialogue UI component:
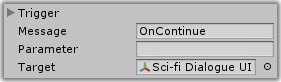
- On the button, expand the Trigger foldout.
- Set Message to
OnContinueConversation. (If you're adding a continue button to the Alert Panel, set it to OnContinueAlert.)
- Set Target to the main Unity Dialogue UI GameObject.
Continue Button Fast Forward
If you're using the typewriter effect and continue buttons, you may want the continue button to only skip the effect forward if the effect is still typing. And, if the effect is done, the continue button should behave normally by progressing to the next stage of the conversation. To do this:
- Add the Continue Button Fast Forward component to your Continue Button(s): Component > Dialogue System > UI > Unity GUI > Controls > Effects > Continue Button Fast Forward.
- Assign the dialogue UI and the label with the typewriter effect.
- Change the button's message to OnFastForward and the target to the button itself.
Continue Buttons Under the Hood
Here's what happens under the hood with continue buttons:
- If the continue button's message is
OnClick or OnContinue, it sends a message "OnContinue" to UnityDialogueUI. This causes UnityDialogueUI to immediately advance the conversation to the next dialogue entry or the response menu, whichever is next.
- If you add a Continue Button Fast Forward component to the continue button and set the message to "OnFastForward" and the target to the continue button GameObject, the logic changes to:
- If a typewriter effect is playing, skip to the end.
- Otherwise (no typewriter or not playing), send "OnContinue" to the UnityDialogueUI, just like #1 above.
If the continue button is assigned to the subtitle's Continue Button field, it will show the button when the subtitle is shown (using GameObject.SetActive), and it will hide the button when the subtitle is hidden. The exception is if the Dialogue Manager's Continue Button mode is set to Never. In this case, the button will never be shown. If you expand the dialogue UI hierarchy in the Scene view during gameplay, you'll see which GameObjects it's activating and deactivating.
Text Field UI
If you want to prompt the player for text input during conversations, you need to create a GameObject under your GUI Root that has a Unity Text Field UI:
- Select your GUI Root or Dialogue Panel, and then select GameObject > Create Other > Dialogue System > Unity GUI > Text Field. This object should be active in the scene, although child objects needn't be active.
- Add and assign child objects for the text field and, optionally, a label. You can also add buttons to accept and/or cancel the input. These should send "OnAccept" or "OnCancel" messages to the Unity Text Field UI object.
See the example scene in Examples/Feature Demo/Text Input Example.
You can find a template for implementing your own ITextFieldUI in Scripts/Templates.
<< Unity UI Dialogue UI | Unity GUI Dialogue UI Prefabs >>