This page describes how to set up the Dialogue System with Opsive's character controllers. (An Opsive character controller asset is required.)
Opsive character controllers copyright © Opsive.
Overview
This integration for Opsive's Character Controllers:
- Gives you the ability to control characters and the camera during conversations.
- Allows you to check and change characters' attributes and inventory in conversations.
- Saves characters' states in saved games and across scene changes.
It works for these Opsive character controllers:
Setup
Enable Integration
To enable Dialogue System integration, select menu item Tools → Opsive → Ultimate Character Controller → Integrations Manager. Scroll down to Dialogue System for Unity, and click the Integration button. This page will then contain the link for the Dialogue System integration package. Download the package and import it.
If you are also using Ultimate Inventory System then, after importing the integration package, select menu item Edit → Project Settings. In the Player → Other Settings section, add UIS to the Scripting Define Symbols field, using a semicolon (;) to separate it from any existing content in the field.
Set Up Characters
- Add a Dialogue Manager GameObject by adding the prefab in Plugins ► Pixel Crushers ► Dialogue System ► Prefabs.
Inspect your character's Ultimate Character Locomotion component. Add a Converse ability:
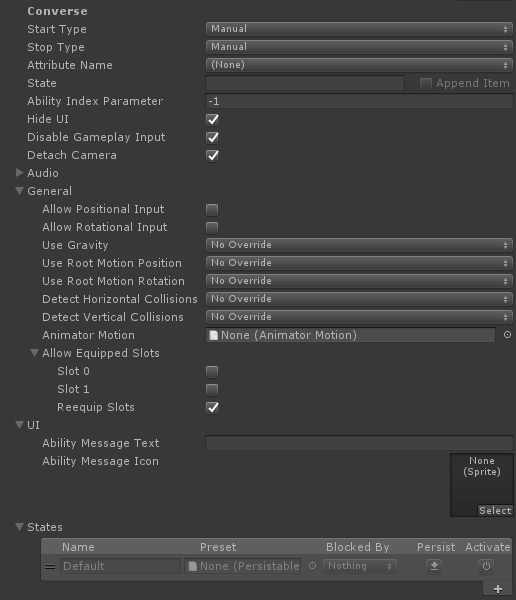
- Leave the Start Type and Stop Type set to Manual. The Dialogue System will manually activate this ability when the character is involved in a conversation.
- Tick Hide UI if you want to hide the player HUD during conversations with the character.
- Tick Disable Gameplay Input if you want to disable player input during conversations.
- Tick Detach Camera if you want to control the camera using sequencer commands.
- Untick Allow Positional Input and Allow Rotation Input to prevent characters from moving during conversations.
- Untick Allow Equipped Slots → Slot 0 and Slot 1 to make the character holster its equipment during conversations.
- NOTE: The Converse ability is a passive ability. It simply pauses the player's movement, camera controls, and HUD during conversations. It does not start conversations by itself. You still need to add a regular Interact ability to be able to start conversations with UCC's interaction system.
- Tip; In the Interact ability, set the Ability Text field to show a text prompt when you can interact. Include {0} in the text to show the target's actor name.
- If you are not using Ultimate Inventory System (UIS), inspect your character's Unity Input component if present. Add a Conversing state:
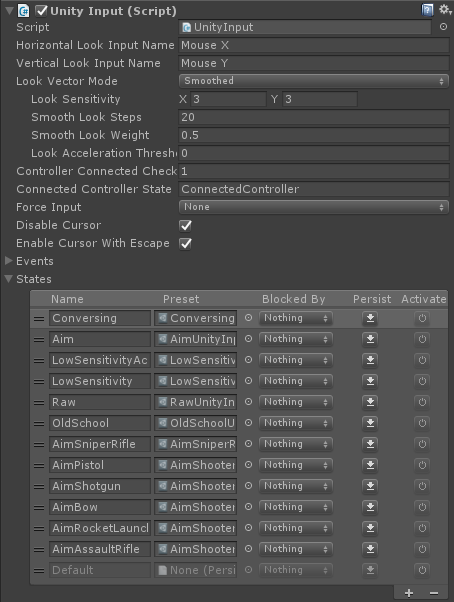
This state activates while the Converse ability is active. It makes the mouse cursor visible. You can change the state's behavior by inspecting its properties.
- If you use another input manager, such as Rewired, add a similar input state for it with the same name (Conversing).
- If you want to use a different state if the player is using using joystick, keyboard, or touch instead of mouse, add another state to the input component, for example named ConversingDisableCursor, and enter that name in the Converse ability's Conversing State Names > Conversing State Hide Cursor field.
- If you are using UIS, add a UCC Menu Utility component and Dialogue System Events component to your player GameObject.
- Configure the OnConversationStart() event to call UCCMenuUtility.OnOpenMenu.
- Configure OnConversationEnd() to call UCCMenuUtility.OnCloseMenu.
If you want to save this character's position, attributes, and inventory in saved games and across scene changes, add a UCC Saver component:
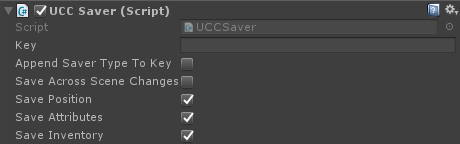
- To use spawnpoints (e.g., specified in Scene Portal components or SaveSystem.LoadScene()), make sure the player GameObject is tagged "Player".
- If the player can pick up items that aren't in the player's initial Inventory:
- Right-click in the Project view and select Create > Pixel Crushers > Dialogue System > UCC Saver Runtime Pickups. This will create a UCC Saver Runtime Pickups asset.
- Identify any items that are used by runtime pickups but are not in the player's initial inventory list. Add them to the UCC Saver Runtime Pickups asset.
- Assign the the UCC Saver Runtime Pickups asset to the UCC Saver component.
- If you want to respawn at the last save (if available), replace the player's CharacterRespawner script with CheckpointCharacterRespawner. When the player dies, it will reload the last save if available. If there's no save available in the specified slot, it will respawn as normal.
Reminder: Add UIS to Scripting Define Symbols if you're using Ultimate Inventory System.
Set Up Interaction
- Add a Dialogue System Trigger Interactable Target component to the interactable object (e.g., NPC). Leave the Trigger dropdown set to On Use. Configure the rest of the component as normal for a Dialogue System Trigger.
- Note: Do not add a Dialogue System Trigger. The Dialogue System Trigger Interactable Target is required to work with UCC's interaction system.
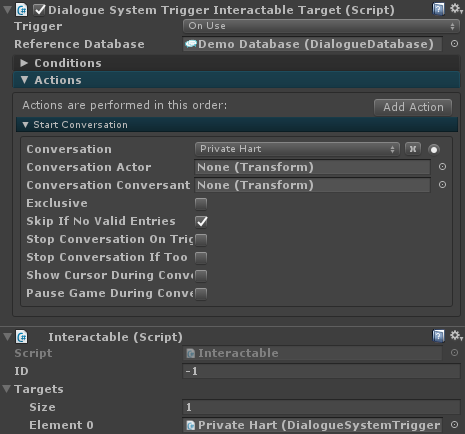
- Add an Interactable component, and assign the Dialogue System Trigger Interactable Target component to its Targets list.
- Add an Interact ability to your player. Configure it to detect your interactable GameObjects. Here is an example Interact ability:
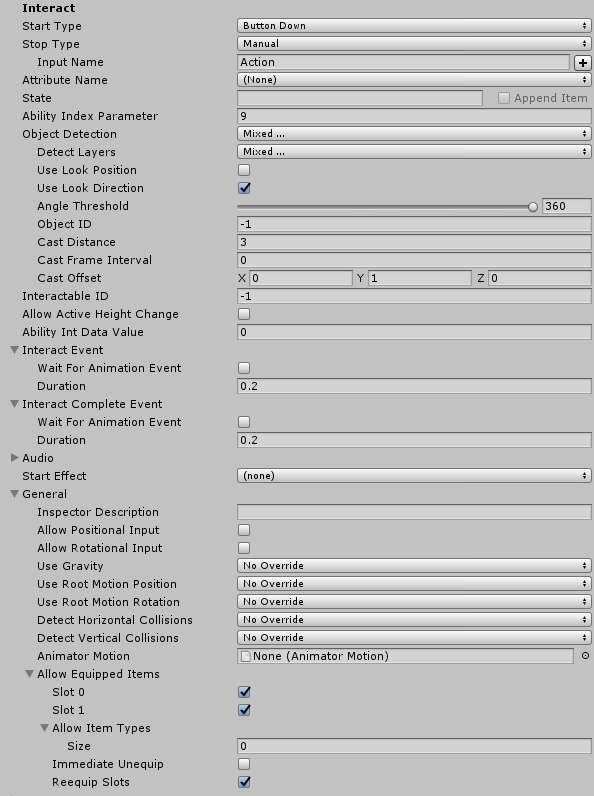
NOTE: To set up interaction on a UCC non-player character (that is, a character being interacted with, not the player), put the Interactable component on the character's Colliders > CapsuleCollider child GameObject.
Lua Functions
You can use the Lua functions below in your dialogue entry Scripts and Conditions, or anywhere you use Lua. Note the exact number and type of parameters required for each function. To enable these Lua functions, add a UCC Lua component to your Dialogue Manager. In the '...' Lua wizard dropdowns, these functions are available in Custom > UCC.
If you're creating a multiplayer game, you can also use the Dialogue System's Lua Networking Functions to synchronize variables and quest states across all clients.
uccGetAttribute( characterName:string, attributeName:string )
- Returns the value of an attribute on a character. See uccLuaCharacterNameNotes.
- Example: Variable["Health"] = uccGetAttribute("", "Health")
uccSetAttribute( characterName:string, attributeName:string, value:number )
- Sets the value of an attribute on a character. See uccLuaCharacterNameNotes.
- Example: uccSetAttribute("", "Health", 100)
uccGetItemCount( characterName:string, itemName:string )
- Returns the amount of an item or ammo contained in a character's inventory. See uccLuaCharacterNameNotes.
- Example: Variable["NumApples"] = uccGetItemCount("", "Apple")
uccAddItem( characterName:string, itemName:string, amount:number )
- Adds an amount of items or ammo to a character's inventory. See uccLuaCharacterNameNotes.
- Example: uccAddItem("", "AssaultRifle", 1)
uccRemoveItem( characterName:string, itemName:string, amount:number )
- Removes an amount of items from a character's inventory. See uccLuaCharacterNameNotes. Note: You can only remove items with this function, not ammo.
- Example: uccRemoveItem("", "AssaultRifle", 1)
uccEquipItem( characterName:string, itemName:string )
- Equips an item. See uccLuaCharacterNameNotes. Will add the item if it's not in the character's inventory.
- Example: uccEquipItem("", "AssaultRifle")
- Note: To use uccEquipItem() and uccUnequipItem(), set the Equip Unequip Item Ability's Auto Equip set to NotPreset.
uccUnequipItem( characterName:string, itemName:string )
- Unequips an item. See uccLuaCharacterNameNotes.
- Example: uccUnequipItem("", "AssaultRifle")
uccNotifyOnEquip( notify:Boolean )
- If set to true, notifies the audio system and other objects when uccAddItem or uccEquipItem equips an item. Otherwise it immediately and silently equips. Initial value is false.
- Example: uccNotifyOnEquip(true)
Character Name Notes
If characterName is blank, it will use the character tagged 'Player'.
You can specify an item collection name by appending it to the character name after a period. Examples:
- "Vendor.SpecialStock" – The Vendor's "SpecialStock" item collection.
- ".Backpack" – The player's "Backpack" item collection.
Sequencer Commands
The integration adds this sequencer command:
uccLookAt( target, subject, [duration], [allAxes] )
- Rotates the subject (UCC-controlled or not) to look at the target.
- Subject defaults to speaker if omitted.
- If no duration is specified, it rotates immediately.
- If
allAxes is specified, it rotates all axes; otherwise it only rotates the Y-axis.
<< Third Party Integration