 |
|
This tutorial demonstrates how to add language localization to dialogue databases and general UI text. We'll add Spanish language localization to the Dialogue System's Demo Scene.
Step 1. Open the Demo Database (or a copy) in the Dialogue Editor.
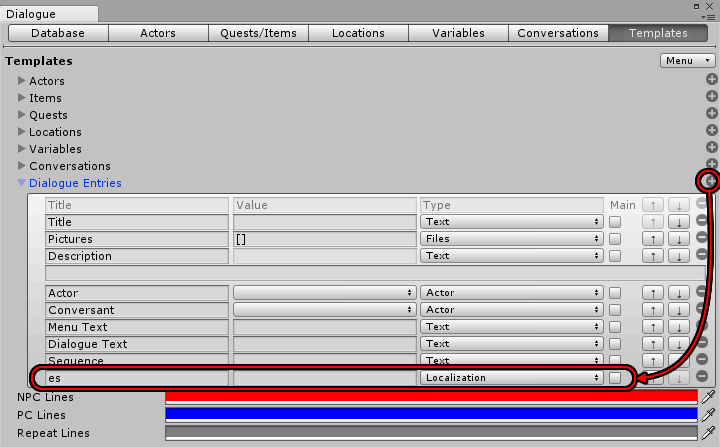
Step 2. On the Templates tab, expand Dialogue Entries. Click the "+" to add a field to the dialogue entry template. Set the Title to "es" (the code we'll use for Spanish) and set the Type to Localization:
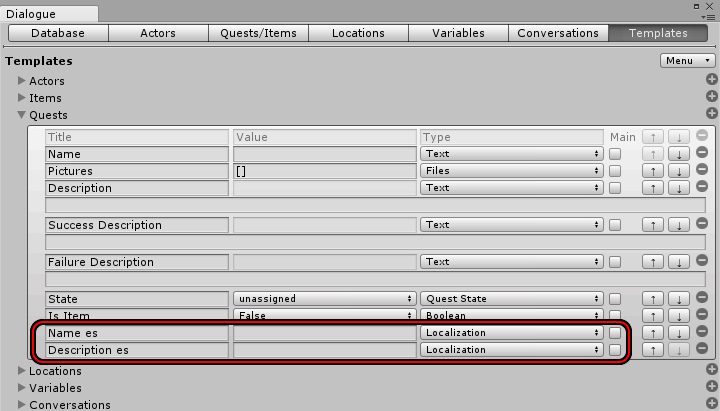
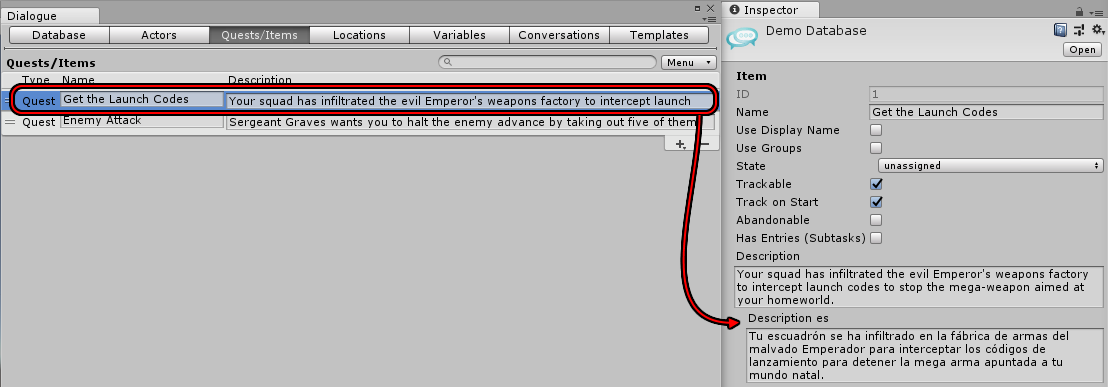
Step 2. Expand Quests. Click the "+" button twice to add two fields to the quest template, "Name es" and "Description es":
If you need to localize other fields, add a field with the language code at the end, such as "Entry 1 es" for the Spanish-localized version of quest entry 1's text.
Step 3. Select Menu → Apply Template To Assets. This will add the new template fields to existing quests and dialogue entry nodes.
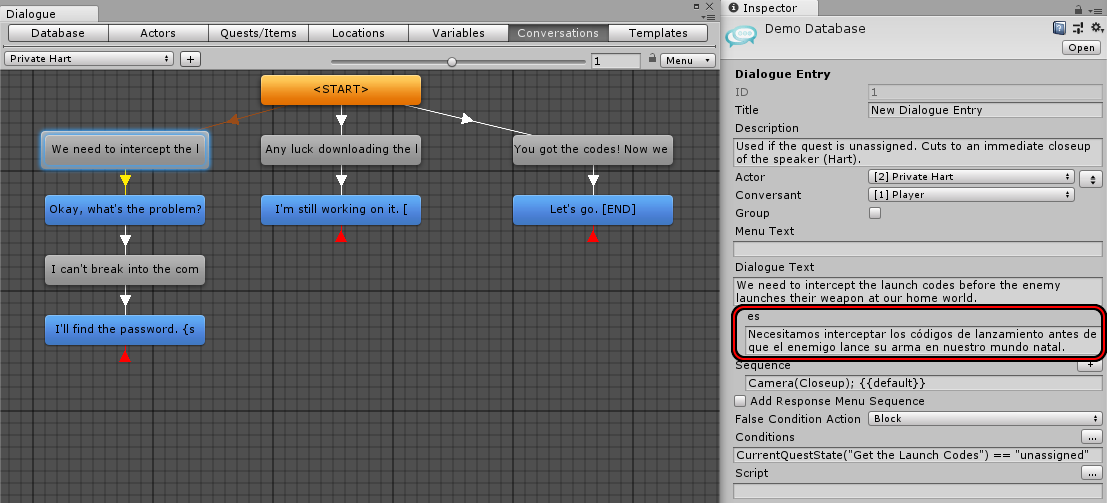
Step 4. On the Conversations tab, click on a node. The Inspector should now show an es field below the regular Dialogue Text field:
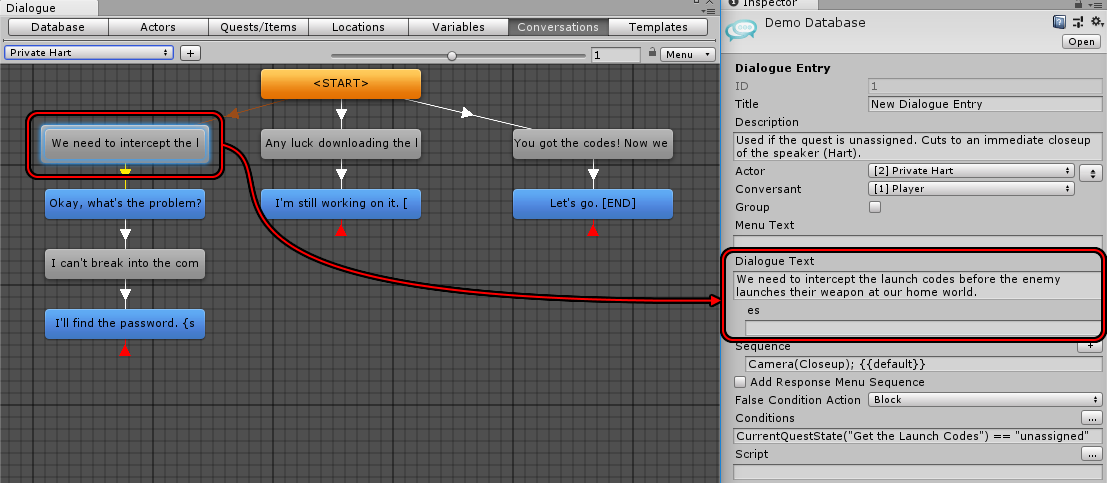
Enter the translation:
Similarly, you can enter translations for quest fields:
Step 5. Instead of manually entering the translations in the Dialogue Editor, you may prefer to export the database to CSV files that you can edit in a spreadsheet program such as Excel or Google Sheets. To do this, on the Database tab expand Localization Export/Import. Click Find Languages to fill the Languages list with all languages currently defined in your database:
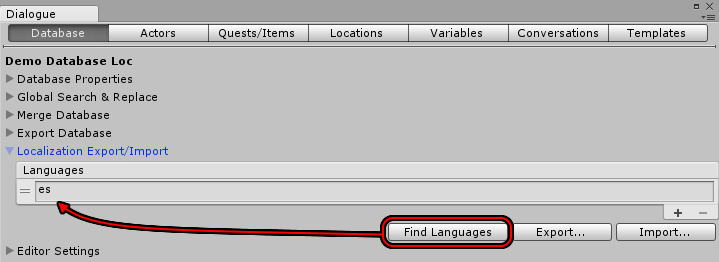
Or you can manually add them if you haven't defined them yet.
Then click Export... to export the database to CSV files. This will export two files for each language: Dialogue_language.csv and Quests_language.csv.
You can add the translations in a spreadsheet program:

To import the updated spreadsheets back into Unity, click Import... and specify the folder containing the spreadsheets.
Alternate Method:
It's generally easier to use the Localization Export/Import feature above. The format of each spreadsheet is simpler, and they're separated by language so you can send separate spreadsheets to different translators.
However, it's also possible to export the entire database into a single CSV file. To do this, on the Database tab expand Export Database, set Format to CSV, and click Export....

You can add the translations in a spreadsheet program:

(Some columns were deleted in the screenshot above for compactness.)
Then import it back into Unity using the CSV import window: Tools → Pixel Crushers → Dialogue System → Import → CSV:

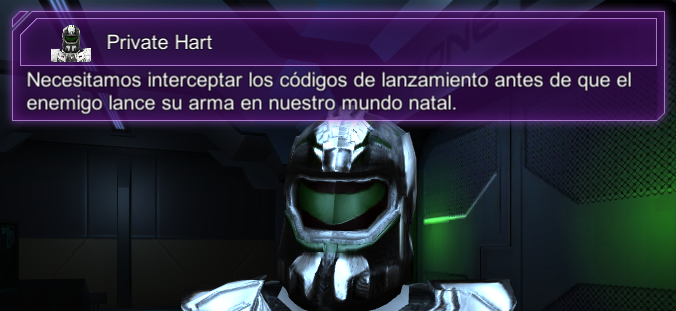
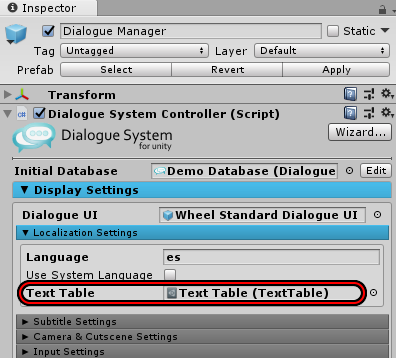
Step 6. To test the translation, inspect the Dialogue Manager and set Display Settings → Localization Settings → Language to "es":

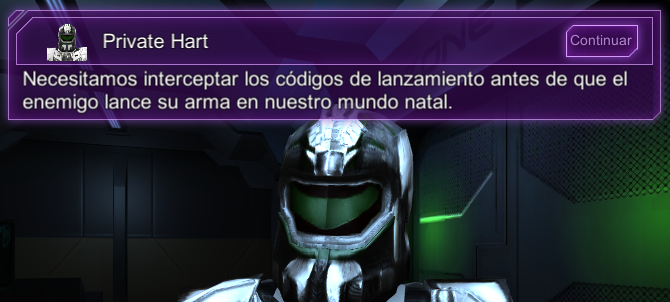
Then play the scene:
There are other ways to set the current language such as in code:
For more information on ways to set the current language, see the Localization section.
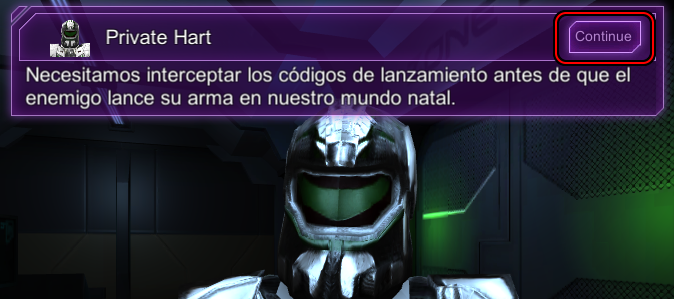
You'll usually also need to localize UI text that isn't in your dialogue database. For example, say you've set Display Settings → Subtitle Settings → Continue Button to Always. The continue button will appear like this:
Step 7. Translations for general UI elements will come from a Text Table asset. To localize the continue button, create a text table by selecting menu item Asset → Create → Pixel Crushers → Common → Text → Text Table. Then double-click the text table to edit it:
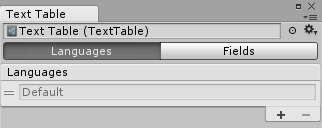
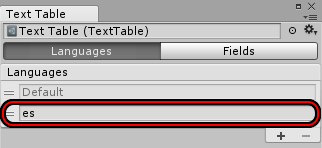
The text table editor starts on the Languages tab. Add an entry for "es":
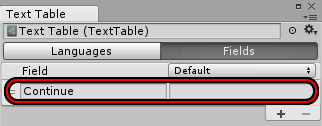
On the Fields tab, add an entry for "Continue":
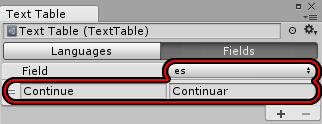
Change the language dropdown to es and enter the Spanish translation:
Step 8. Assign the text table to the Dialogue Manager's Display Settings → Localization Settings → Text Table:
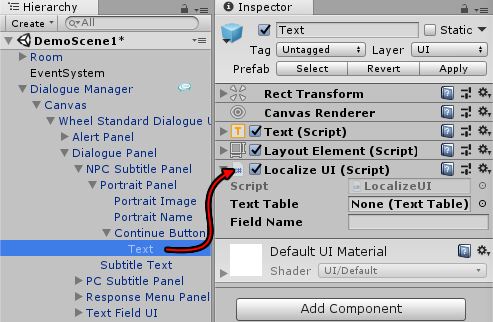
Step 9. Then inspect the continue button's Text element, and add a Localize UI component:
Now when you play the continue button will be localized:
I2 Localization Support provides an alternate way to add language localization.
<< Tutorials