 |
|
The video tutorial is recommended over the text tutorial below as it's newer:
Note: If you are making a 2D project, see Enable Physics2D Support.
This tutorial demonstrates how to set up interaction.
This tutorial uses the standard 2D character controller available in the Standard Assets for Unity 2018 package, which is available here: https://assetstore.unity.com/packages/essentials/asset-packs/standard-assets-for-unity-2018-4-32351
However, the same process applies to 3D and other character controllers.
Learntocreategames.com has written a guide to use Standard Assets in Unity 2020+: https://learntocreategames.com/importing-and-using-standard-assets-with-unity-2020/
Step 1. Enable Physics2D Support.
Step 2. Import Unity's standard 2D assets: Assets → Import Package → 2D.
Step 3. In a new scene, add the Platform36x01 prefab and set its position to (-20, 0, 0).
Step 4. Add CharacterRobotBoy and set its position to (0, 2, 0).
Step 5. Add two new sprites. Name them Box1 and Box2.
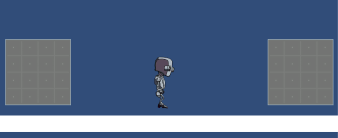
At this point, your scene should look similar to this:
Now we'll add the Dialogue System components!
Step 6. Add the Dialogue Manager prefab. Assign the database in Plugins ► Pixel Crushers ► Dialogue System ► Demo ► Data to the Initial Database field.
Step 7. Inspect Box1. Add a Dialogue Actor component. Assign Plugins ► Pixel Crushers ► Dialogue System ► Prefabs ► Standard UI Prefabs ► Templates ► Bubble ► Bubble Template Standard Bark UI to the Dialogue Actor's Bark UI Settings → Bark UI, and set the Bark UI Offset to (1, 1, 0). The Dialogue Actor will instantiate this bark UI prefab at runtime.
Step 8. Add another BoxCollider2D. Set its Size → X to 5. Tick Is Trigger.
Step 9. Add a Dialogue System Trigger component.
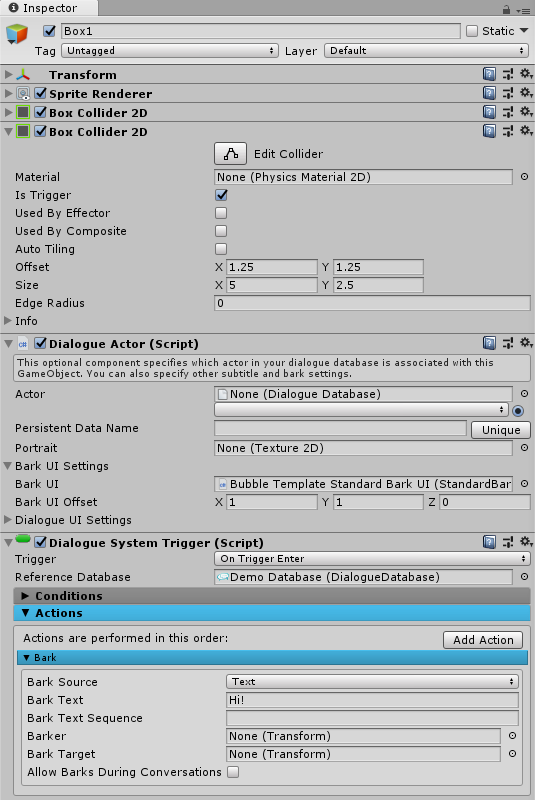
Box1's Inspector should now look similar to this:
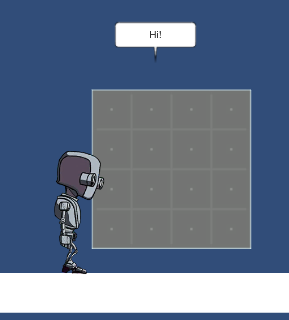
Play the scene and run up to Box1. When you enter Box1's trigger collider, the Dialogue System Trigger should cause Box1 to bark "Hi!":
Step 10. Inspect Box2. Add a Usable component.
Step 11. Add a Dialogue System Trigger component.
Step 12. Inspect our player, CharacterRobotBoy. Add another BoxCollider2D. Set its Offset to (1, 0) and Size to (1, 1). Tick Is Trigger.
Step 13. Add a Proximity Selector. Selector components and Proximity Selector components detect GameObjects that have Usable components and allow you to interact with them. Since the space bar is already mapped to the 2D controller's jump action, we'll use the E key to interact.
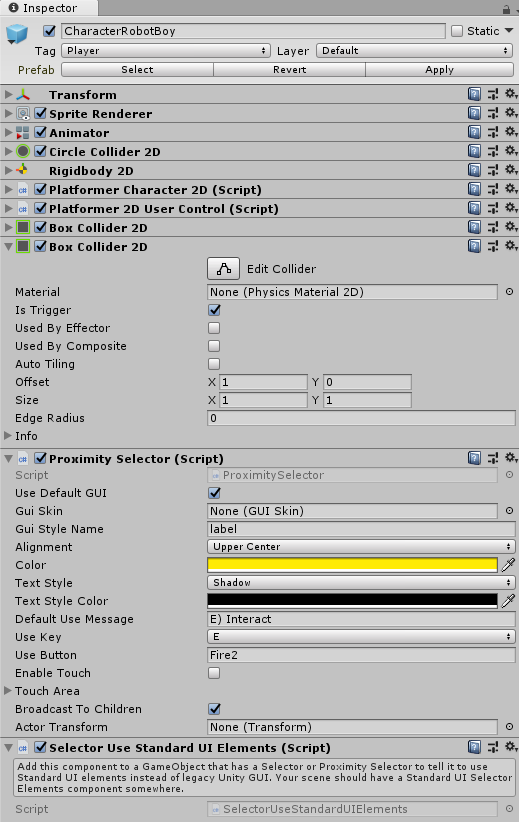
CharacterRobotBoy's Inspector should now look similar to this:
Step 14. Play the scene and run up to Box2. Then press E.
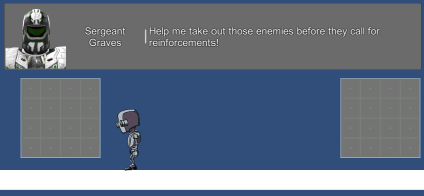
You may notice one thing: You can still move around while the conversation is playing.
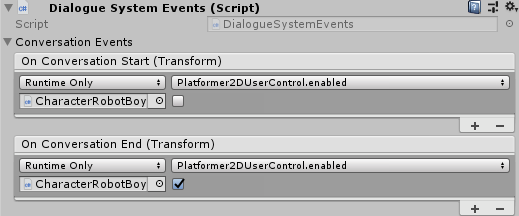
In many cases, you can use a Dialogue System Events component to disable player control during conversations. You can also use it to disable the Proximity Selector during conversations. For example, you could set the On Conversation Start and On Conversation End events to disable the player's Platformer2DUserControl component:
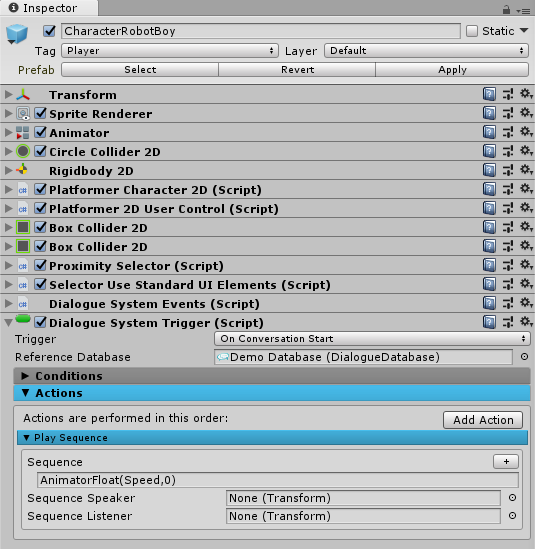
Unfortunately, this won't always suffice. In the case of the 2D controller, the player's Animator will continue to play animations based on its animator parameter values. If the player were running when you pressed the E key, the player would continue to play the run animation. The solution is to also add a Dialogue System Trigger to the player.
AnimatorFloat(Speed,0)
Your CharacterRobotBoy's Inspector should now look similar to this:
If you prefer to handle this in code instead, you can add a script with OnConversationStart and OnConversationEnd methods as described in Script Messages & Events.
The Proximity Selector and Selector components are very versatile. You can move the trigger colliders to the Usable objects instead of the player if you prefer. Proximity Selector works with trigger colliders. Selector, on the other hand, runs a raycast. You can configure the Selector to raycast from the mouse position, or the center of the screen (useful for first-person controllers), or a custom source.
Selector and Proximity Selector are also entirely optional. You can use your own interaction functionality if you prefer.
<< Tutorials