This page describes how to set up the Dialogue System with S-Inventory support and Realistic FPS Prefab support. (S-Inventory v1.21+ and Realistic FPS Prefab v1.22+ are required.)
- S-Inventory copyright © SoumiDelRio.
- Realistic FPS Prefab copyright © Azuline Studios.
You should first familiarize yourself with basic Realistic FPS Prefab (RFPS) integration and S-Inventory integration separately. The S-Inventory / Realistic FPS Prefab package builds on top of both of these.
RFPS / S-Inventory Setup
Follow these steps to set up the Dialogue System with Realistic FPS Prefab and S-Inventory.
Import Files
- Import the package
Third Party Support/Realistic FPS Prefab Support. This will unpack files into the folder Third Party Support/Realistic FPS Prefab.
- Import the package
Third Party Support/S-Inventory Support. This will unpack files into the folder Third Party Support/S-Inventory.
- Import the package
Third Party Support/S-Inventory Support/RFPS S-Inventory Support. This will unpack files into the folder Third Party Support/S-Inventory/RFPS S-Inventory.
- Make sure to re-add the Horizontal and Vertical input settings as described in Realistic FPS Prefab Setup Part 1.
Setup Player
Follow these steps to set up the player:
- Configure the player as described in Realistic FPS Prefab Setup.
- Configure the player's inventory and UI canvas as described in Setup Actors. Note: If upgrading from S-Inventory v1.24 or earlier, delete the player's SInventoryC# child GameObject, and add the S-Inventory's new SInventoryC# prefab as a root (parentless) object in the scene.
- Add an S-Inventory FPS Bridge component. (Component > Dialogue System > Third Party > S-Inventory > RFPS > S-Inventory FPS Bridge) This component mediates between RFPS control and S-Inventory control.
- Add two slots to the On Open Inventory event. Assign FPS Camera > SmoothMouseLook.enabled and FPS Weapons > Deadzone Pivot H > WeaponPivot.enabled, and set both false (unticked).
- Add two slots to the On Close Inventory event. Assign FPS Camera > SmoothMouseLook.enabled and FPS Weapons > Deadzone Pivot H > WeaponPivot.enabled, and set both true (ticked).
- Refer to the example scene to see an example of how this is configured.
- Add an FPS Inventory Events component. (Component > Dialogue System > Third Party > S-Inventory > RFPS > S-Inventory FPS Events) This will automatically add its dependency, an S-Inventory Inventory Events component. This component hooks into Inventory Events. When you equip a weapon in S-Inventory, it also equips it in RFPS. You can add your own event handlers using the Inventory Events component's C# event hooks.
- In FPS Weapons, inspect each weapon. On the Weapon Behavior component:
- Untick Droppable. Dropping must be done through S-Inventory, not using RFPS's drop key.
- Set Weapon Drop Obj to a prefab that contains an SInventory Weapon Pickup (see sInventoryRFPSSetupWeapons).
Your player should have these components:
- Set Active On Dialogue Event
- Set Enabled On Dialogue Event
- Persistent Position Data
- FPS Lua Bridge
- SInventory Dialogue Actor
- SInventory FPS Bridge
- Inventory Events
- FPS Inventory Events
With S-Inventory 1.25+, the scene instance of the S-InventoryC# prefab should NOT be a child GameObject of the player. It should be a root object in the scene with no parent.
Finally, check your FPS Main Camera. If it has a Selector, make sure its Actor Transform points to the player.
Setup Items
There are four types of items, each of which is set up differently:
- Regular item pickups
- Consumable pickups
- Weapon pickups
- Ammo pickups
Remember to save all items as prefabs in a Resources folder. The Item name in the Item script must exactly match the name of the GameObject and prefab.
Setup Regular Items
Regular items include trade goods and other things that don't have a specific use in RFPS. To make a regular item compatible with S-Inventory:
- Set the Tag to Usable and the Layer to Ragdolls/Pickups.
- Add a renderer if it doesn't have one. This is required. It doesn't actually have to render anything.
- Add an SInventory Pickup component.
- Add an S-Inventory Item component. The Item name in the Item script must exactly match the name of the GameObject and prefab.
- Add an S-Inventory Persistent Item Pickup component if you want saved games to remember whether this item has been picked up.
For an example, see RFPS S-Inventory/Example/Resources/Log.
Setup Consumables
Consumable items include medkits, food, and drink. To make an RFPS consumable item compatible with S-Inventory:
- Set the Tag to Usable and the Layer to Ragdolls/Pickups.
- Add a renderer if it doesn't have one. This is required. It doesn't actually have to render anything.
- Add an SInventory Consumable Pickup component.
- Configure the benefits it provides (health, hunger, thirst).
- If it's used immediately on pickup, tick Use On Pickup. Otherwise it will be added to the inventory on pickup.
- Add an S-Inventory Item component.
- If you want to be able to use the item from the inventory window, tick Usable.
- Remove the RFPS pickup component. (This is different from regular item pickups.)
- Add an S-Inventory Persistent Item Pickup component if you want saved games to remember whether this item has been picked up.
For an example, see RFPS S-Inventory/Example/Resources/Medkit.
Setup Weapons
To make an RFPS weapon compatible with S-Inventory:
- Set the Tag to Usable and the Layer to Ragdolls/Pickups.
- Remove the Weapon Pickup component.
- Add an SInventory Weapon Pickup component.
- Set the Weapon Number to the correct slot in the player's weapon order (e.g.,
3 for Shotgun).
- Tick Allow Multiple if the player is allowed to carry more than one copy of the weapon.
- Add a renderer if it doesn't have one. This is required. It doesn't actually have to render anything.
- Add an S-Inventory Item component.
- Set the Equipment Slot to "Main Arm".
- Add an S-Inventory Persistent Item Pickup component if you want saved games to remember whether this item has been picked up.
For an example, see RFPS S-Inventory/Example/Resources/Shotgun.
Setup Ammo
To make an RFPS weapon pickup compatible with S-Inventory:
- Set the Tag to Usable and the Layer to Ragdolls/Pickups.
- On the Ammo Pickup component, you must untick Remove On Use.
- Add a renderer if it doesn't have one. This is required. It doesn't actually have to render anything.
- Add an SInventory Pickup component. This component supplements the RFPS Ammo Pickup script, so don't remove the RFPS script.
- Add an S-Inventory Item component. Make sure the Amount matches the Ammo Pickup Ammo To Add value.
- Add an S-Inventory Persistent Item Pickup component if you want saved games to remember whether this item has been picked up.
For an example, see RFPS S-Inventory/Example/Resources/Shell.
Setup Vendors
Vendors are set up the same way as described in the S-Inventory Setup Vendors instructions. Remember to add in-scene instances of item prefabs to the vendor, not prefabs themselves. In addition:
- Set the Layer to NPCs.
- You may want to set the Tag to NoHitMark to prevent the player from killing the vendor.
- If you use the SInventoryPersistentVendor component, the items for sale must be associated with item prefabs, and the names cannot contain colons (':').
Item Groups
Item groups such as crates are set up the same way as described in the S-Inventory Setup Item Groups instructions. Remember to add in-scene instances of item prefabs to the item group, not prefabs themselves. If you use the SInventoryPersistentItemGroup component, the items must be associated with item prefabs, and the names cannot contain colons (':').
Harvestables
Harvestables are GameObjects that you can mine for resources. In the example scene, an example harvestable is the Choppable Tree.
To make a GameObject harvestable:
- Set the Tag to its composition type (e.g., Wood).
- Set the Layer to NPCs.
- Add a collider and a rigidbody. The rigidbody can be marked Is Kinematic.
- Add an RFPS Character Damage script.
- Set Hit Points to the amount of hit points required to harvest (e.g., chop down) the GameObject.
- Set Dead Replacement to an RFPS/S-Inventory-compatible item (see Setup Regular Items).
- Add an Animator component. Assign Example/Content/Empty Animator Controller to it.
- Add a NavMeshAgent component.
- Add an AI component.
- Add an NPC Attack component. Set Range to
0.
Set up the dead replacement as per Setup Regular Items, and also:
- Set the Tag to Usable.
- Set the Layer to Pickups/Ragdoll.
- Add a collider and rigidbody.
Conversations
When manipulating inventories in conversations, use the S-Inventory Lua Functions. Only set the RFPS Variable["</c><em>weapon</em><c>"] values to specify whether the player can equip a weapon or not.
Example Scene
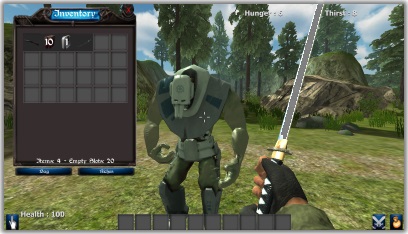
The RFPS S-Inventory/Example folder contains an example scene based on the RFPS support example scene. When you start, you'll find:
- A chest (S-Inventory item group) to your left.
- A vendor to your right.
- A choppable tree past the house.
The house contains S-Inventory-compatible pickups, including: 2 Shotguns, Katana, Shells, and Medkit.
The Sad Robot quest conversation also removes the shotgun properly from S-Inventory as well as RFPS.
The Happy Robot conversation also adds and removes items using both S-Inventory and RFPS Lua functions.
The other items in the example scene have not been made S-Inventory-compatible.
<< S-Inventory