 |
|
(Click Here For Video Version)
This tutorial demonstrates how to add conditions to a conversation. We'll write a conversation in which an NPC (the Detective) interrogates the player about a murder. The player can reply that he was at home or at work. The Detective will follow up based on the player's answer.
Step 1. Create a new scene (File → New Scene).
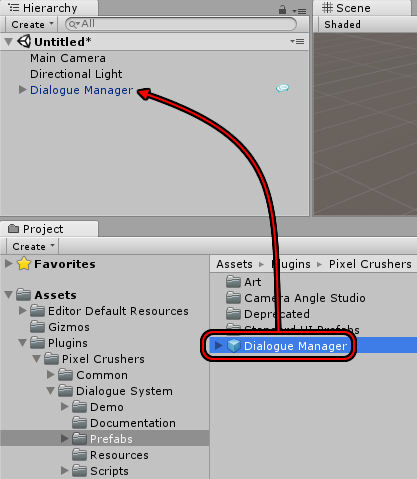
Step 2. Drag the prefab Assets ► Plugins ► Pixel Crushers ► Dialogue System ► Prefabs ► Dialogue Manager into the scene:
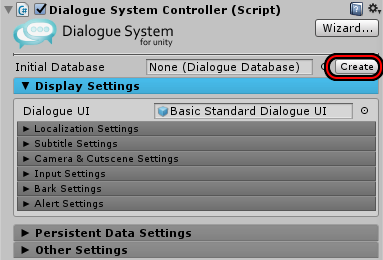
Step 3. Inspect the Dialogue Manager GameObject. Next to the Initial Database field, click Create:
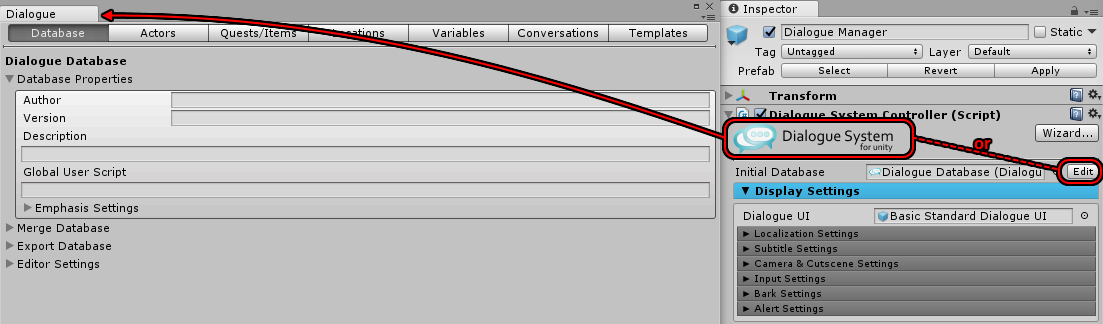
Step 4. After specifying a name for your database, the Dialogue Editor window should automatically open. If you want to open it manually, inspect the Dialogue Manager and click the Edit button or the Dialogue System logo banner. This will open the Dialogue Editor window:
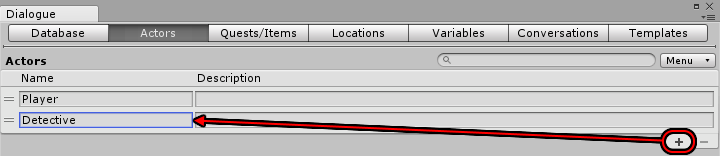
Step 5. On the Actors tab, click "+" to add an actor. Set its Name to "Detective":
Select the Player actor, and in the Inspector tick Use Display Name and set Display Name to "Mr. Smith":

Setting the Display Name is an optional step that we'll take in this tutorial just to demonstrate its use. In your own project, you could allow the player to set their character's name by setting the Display Name field.
Step 6. On the Variables tab, click "+" and select Boolean to add a true/false variable. Name it "AtWork":
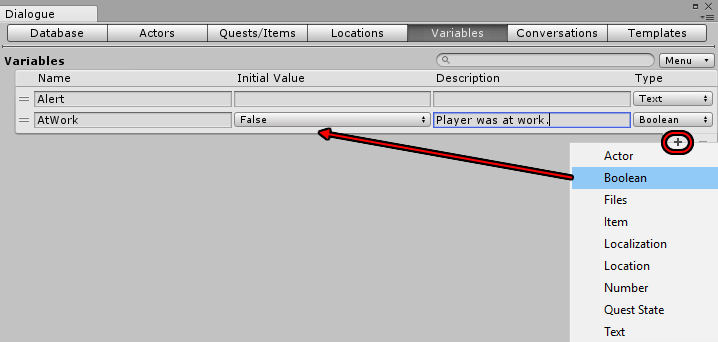
This variable will remember whether the player said he was at work or at home.
Step 7. On the Conversations tab, click "+" to add a new conversation. Click on blank canvas space to inspect the conversation's properties. Set the Title to "Questioning":
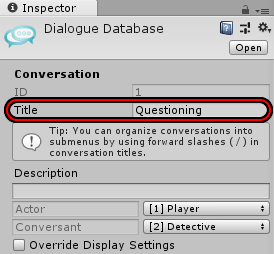
You can also see above that the primary Actor is our Player actor, and the primary Conversant is the Detective.
Step 8. Right-click on the START node and select Create Child Node. Set the Dialogue Text to "Got a minute, [var=Actor]?"
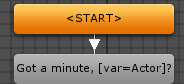
The text [var=Actor] is a markup tag. It will be replaced by the primary Actor's Name, or its Display Name if set.
Continue adding nodes as shown below. To easily swap the speaker and listener of a node (as in the "Where were you last night?" node), inspect the node and click the up/down arrow button next to the Actor and Conversant dropdowns.

The text is:
NPC: Got a minute, [var=Actor]?
NPC: Where were you at 9 PM?
Player: At home.
Player: At work.
NPC: Lacy Devine was found dead in your shop. Time of death was 9 PM.
Player: I was home asleep.
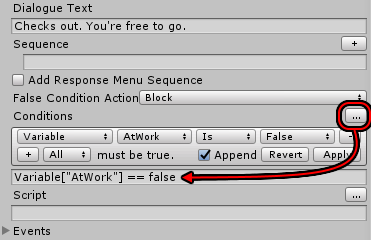
NPC: Checks out. You're free to go.
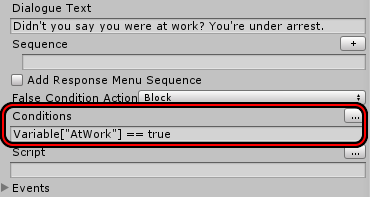
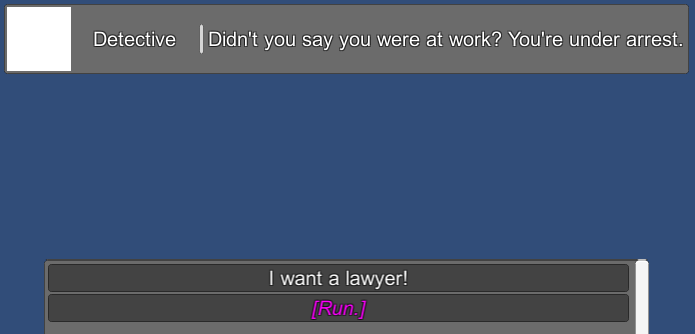
NPC: Didn't you say you were at work? You're under arrest.
Player: I want a lawyer!
Player: [Run.]Step 9. Now we need to add the conditional logic. Inspect the "At home." node. Next to Script, click the "..." button. Then click "+". From the dropdowns, select Variable → AtWork → False and click Apply:
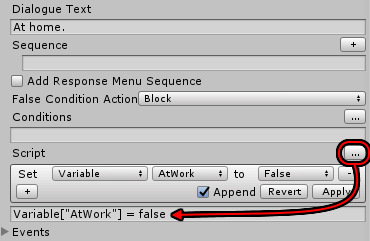
Repeat for "At work." but set the variable to True:
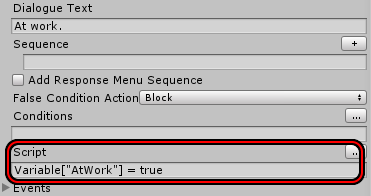
The Script fields will set the "AtWork" variable based on the player's response.
Next, inspect the "Checks out. You're free to go." node. Next to Conditions, click the "..." button. Then click "+". From the dropdowns, select Variable → AtWork → Is → False and click Apply:
Inspect the "Didn't you say you were at work?" node and set Conditions to Variable → AtWork → Is → True:
Step 10. Inspect the "[Run.]" node. We'll use this node to represent an action instead of spoken text. Change the Dialogue Text to "[em1][Run.][/em1]":

Then on the Database tab, expand Emphasis Settings and examine Emphasis 1. Tick Italic and set the Color to some value such as magenta:
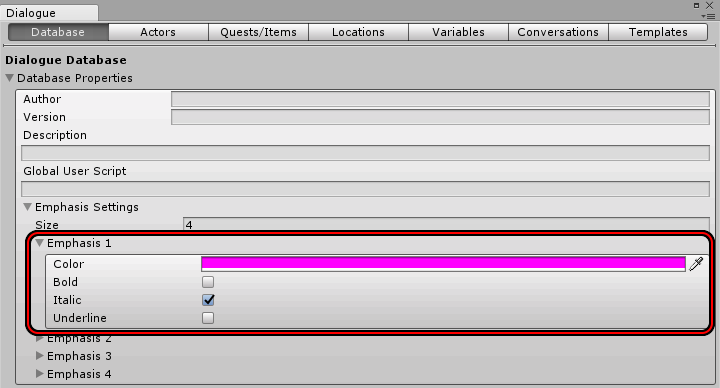
The Dialogue Text's [em1]...[em1] Markup Tags will apply the Emphasis 1 settings to the text, so it will be shown in magenta italics.
Alternatively, you could use the [a] (Action) markup tag to just show the text in italics.
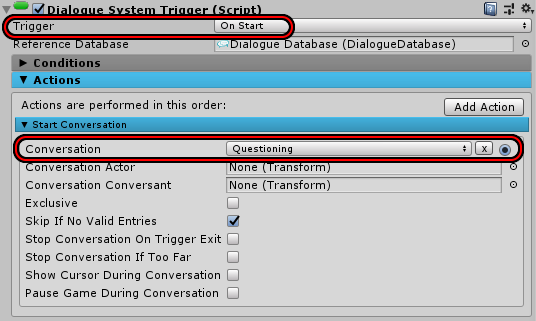
Step 11. Add a Dialogue System Trigger to the scene, for example on an empty GameObject. Set the Trigger to On Start. Click the Add Action button and select Start Conversation. Set the Conversation dropdown to Questioning:
Finally, play the scene!
Your Conditions and Scripts can work with much more than just variables. You can also work with quest states, actor fields, and even your own C# methods that you've registered with the Dialogue System.
<< Tutorials