 |
|
The Dialogue System supports language localization for dialogue databases and also provides general purpose Localized Text Tables.
When you change the language from the default, the Dialogue System will use text from fields that contain localized versions for the specified language.
I2 Localization Support: The Dialogue System supports Inter Illusion's I2 Localization. If you use I2 Localization, you may want to use the Dialogue System's I2 Localization Support.
For each localized language, you will use a language code. The codes are up to you, but we recommend using the Culture Names defined in Microsoft's CultureInfo Class because this is what the Dialogue System’s Localization class uses. It's also used by the Chat Mapper tutorial on localization.
Example language codes are:
| Code | Language |
|---|---|
| es | Spanish - general |
| ru | Russian - general |
| fr-CA | French - Canadian |
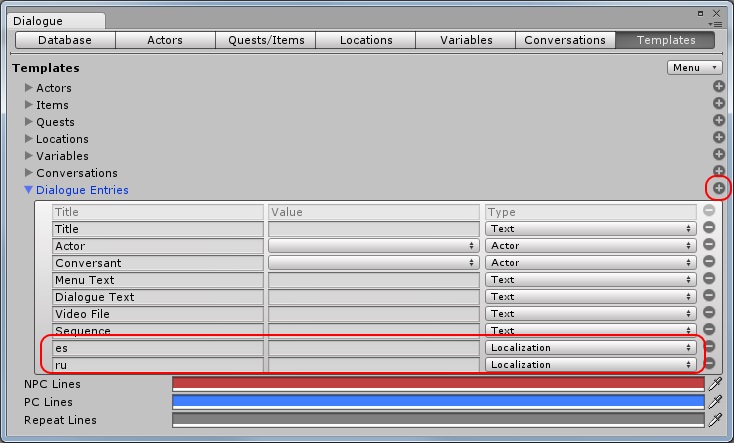
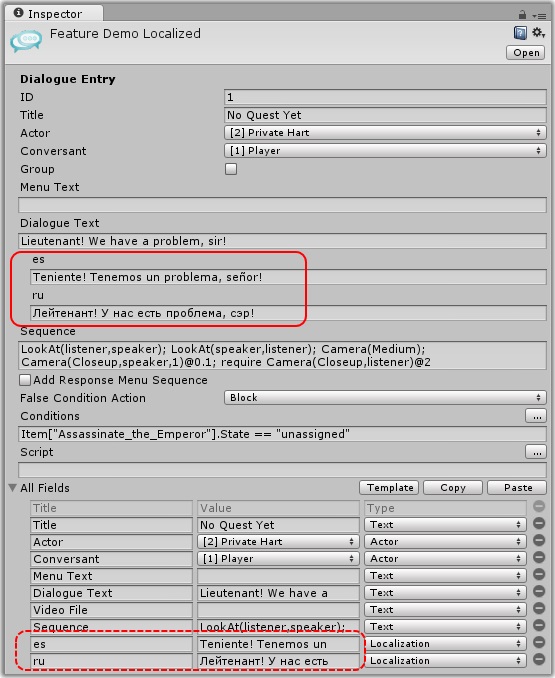
All fields are localizable by adding a blank space and the language code to the field name. The one exception is the Dialogue Text field. For Dialogue Text, use the language code by itself. Set the Type of localized fields to Localization.
The fields below are common ones to localize. If a localized field name is not defined for the current language, it will use the default field.
For each language LN, the names of the dialogue entry fields will be:
| Default Field | Localized Field | Example |
|---|---|---|
| Dialogue Text | LN | es |
| Menu Text | Menu Text LN | Menu Text es |
| Sequence | Sequence LN | Sequence es |
| Response Menu Sequence | Response Menu Sequence LN | Response Menu Sequence es |
For each language LN, the names of the quest fields will be:
| Default Field | Localized Field | Example |
|---|---|---|
| Name | Name LN | Name es |
| Description | Description LN | Description es |
| Success Description | Success Description LN | Success Description es |
| Failure Description | Failure Description LN | Failure Description es |
| Entry # | Entry # LN | Entry 3 es |
In Lua code, you can use the GetLocalizedText() Function function to get the localized version of a field, which can be useful in dialogue entry Script or Conditions fields, and using the [lua] markup tag.
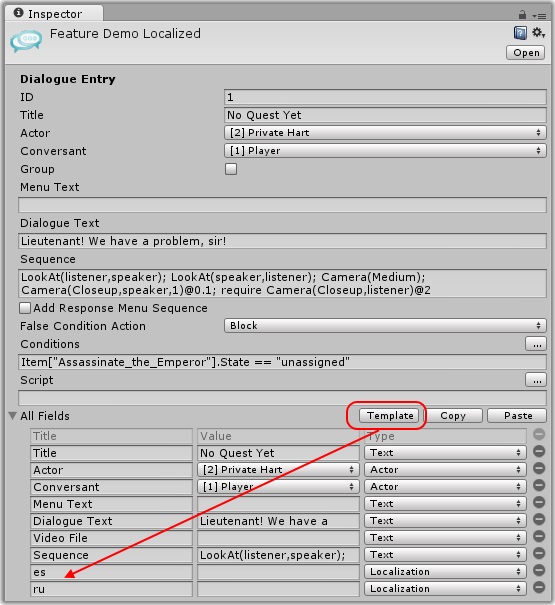
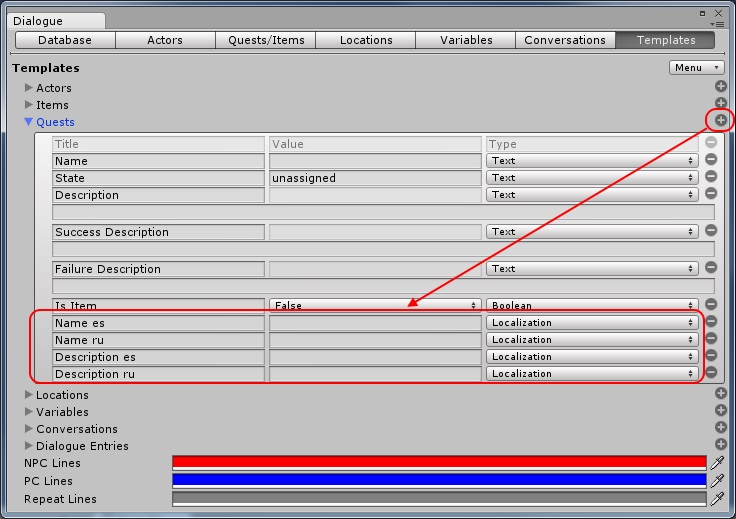
The easiest way to localize using the Dialogue Editor is to add localization fields to the template on the Dialogue Editor Templates Tab. This way, they will automatically be added to assets as you add them.
Follow the instructions below to add localization to a dialogue database.
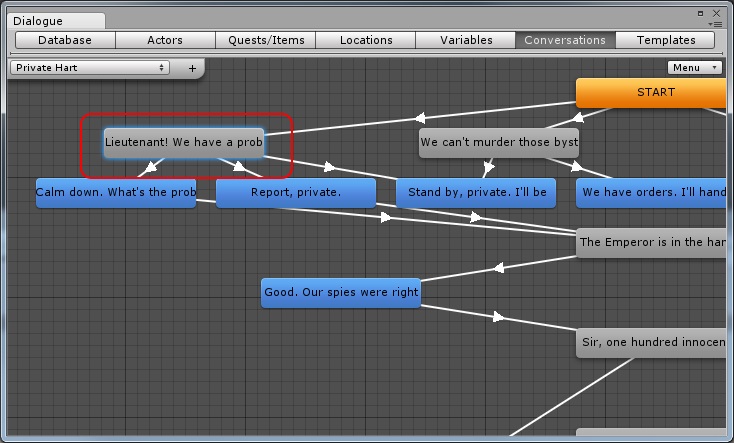
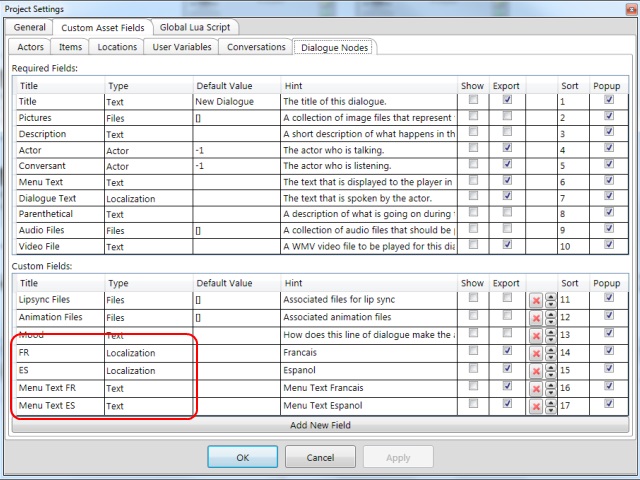
These steps demonstrate how to add Spanish (es) and Russian (ru) to conversations.
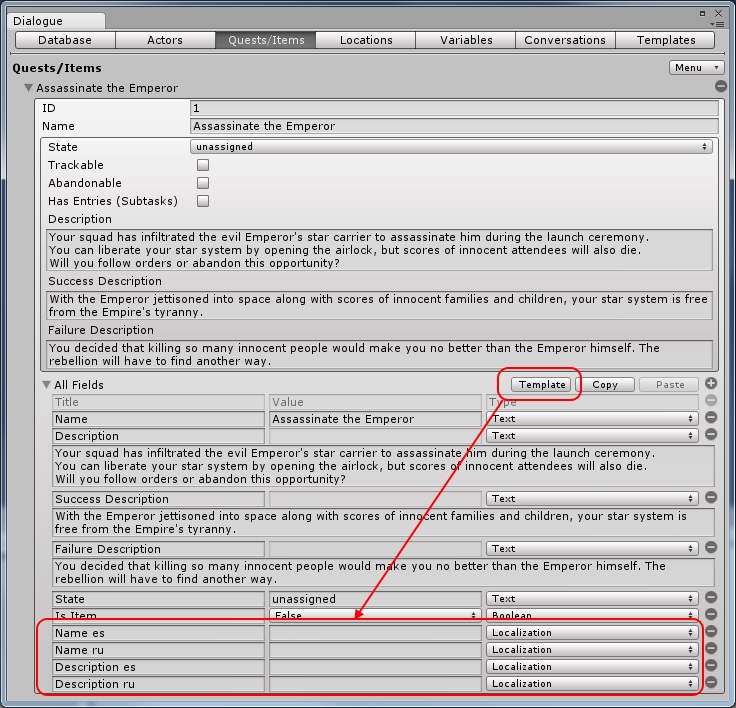
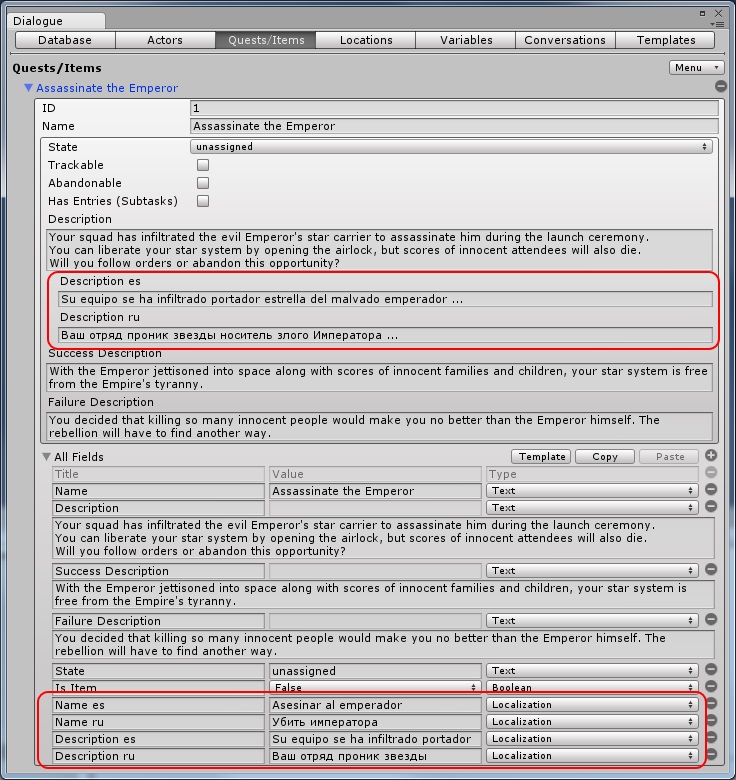
These steps demonstrate how to add Spanish (es) and Russian (ru) to quests.
To localize quest entries, create custom fields titled Entry n language such as "Entry 1 es".
Chat Mapper makes localization easy. The Chat Mapper Converter automatically imports all Chat Mapper localization settings. To set up localization in Chat Mapper, follow these steps:
Chat Mapper's tree view show the dialogue text of the active localization. To change the active localization, select a choice from the Active Localization drop-down on the main window.
When editing dialogue entries, if you leave a localized version of a field blank, the Dialogue System will use the default version.
Note that Chat Mapper only localizes Dialogue Text. The Dialogue System also localizes Menu Text and Sequence. You won't see this in Chat Mapper's simulator, but it will take effect in Unity.
The Dialogue System also provides a general-purpose localization system that you can use for any text outside of dialogue databases, such as labels on your dialogue UIs.
Localized data is stored in a localized text table. You can also import and export CSV (spreadsheet) format to hand off translation work to translators.
To create a localized text table:
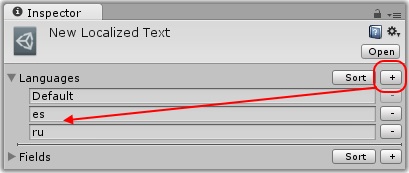
You can assign localized text tables to the Dialogue Manager, Alert Trigger, and dialogue UI controls.
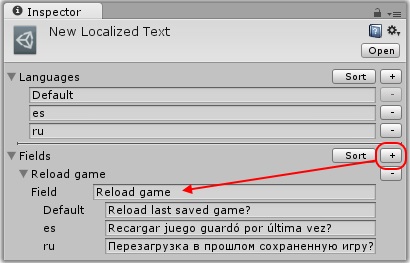
To use a localization text table in a script, call:
LocalizedTextTable["fieldname"];
where fieldname is the name of the field. This will return the current value of the field based on the current language. Example:
string reloadMessage = myLocalizedTextTable["Reload game"];
To import and export CSV (comma-separated value) spreadsheet format, select Import... or Export... from the menu at the top of the Inspector view (not shown in the screenshots above).
To localize text in Unity GUI, see the Unity GUI Localization page.
To localize text in Unity UI, see the Unity UI Localization page.
More information: PixelCrushers.DialogueSystem.LocalizedTextTable
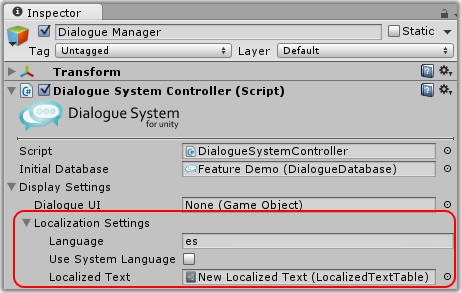
To localize gameplay alert messages, assign a localized text table to the Dialogue Manager's Localization Settings > Localized Text.
When the Dialogue System shows an alert, it will first try to use the alert message as a field index into the localized text table. Otherwise, if the alert message is not a field index in the table, it will just show the alert message itself.
During conversations, if a localized version of a field exists for the current language, the Dialogue System will use it instead of the default version. You can set the current language on the Dialogue Manager object or by script.
To get the current language, read the Localization.Language property.
On the Dialogue Manager object, under Localization Settings, set the Language property to the desired language code, or blank to use the default language (i.e., Menu Text instead of Menu Text fr-CA). If you tick Use System Language, then on start the Dialogue System will set the Language property to the current system language.
To change the current language, set DialogueManager.SetLanguage. For example:
DialogueManager.SetLanguage("es"); // Use Spanish.
Or, to use .NET enumerations, use the Localization.GetLanguage() method:
DialogueManager.SetLanguage(Localization.GetLanguage(SystemLanguage.Spanish)); // Use Spanish.
To set the current language using a visual scripting system such as PlayMaker, use the SetLanguage action provided by the Dialogue System's support package for that visual scripting system.
By default, if a localized field is missing or blank, the Dialogue System will use the default language's value. You can change this by setting Localization.UseDefaultIfUndefined to false.
<< How to Customize the Sequencer | How to Set up Components >>